Using Tags and Tag Clouds in Postach.io
In this post you're going to learn how to take full advantage of tags in Postach.io. You'll be looking at how to add and remove tags from posts, as well as how to add support for tags to your own custom Postach.io themes.

Adding & Removing Tags From Posts
The tags displayed on your Postach.io blog will directly mirror any tags that you add to notes in Evernote, with just a few exceptions. Postach.io uses some tags, such as published and page, to generate the pages of your blog. These reserved tags will not be displayed to your readers when applied to a post.
Adding and removing tags is really easy to do using the Evernote editor. The interface for managing tags may look slightly different depending on which Evernote app you're using. In the Evernote web and desktop apps the tags interface is displayed above the post title.
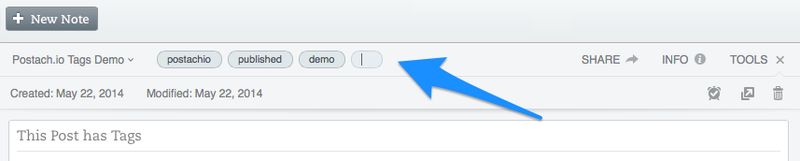
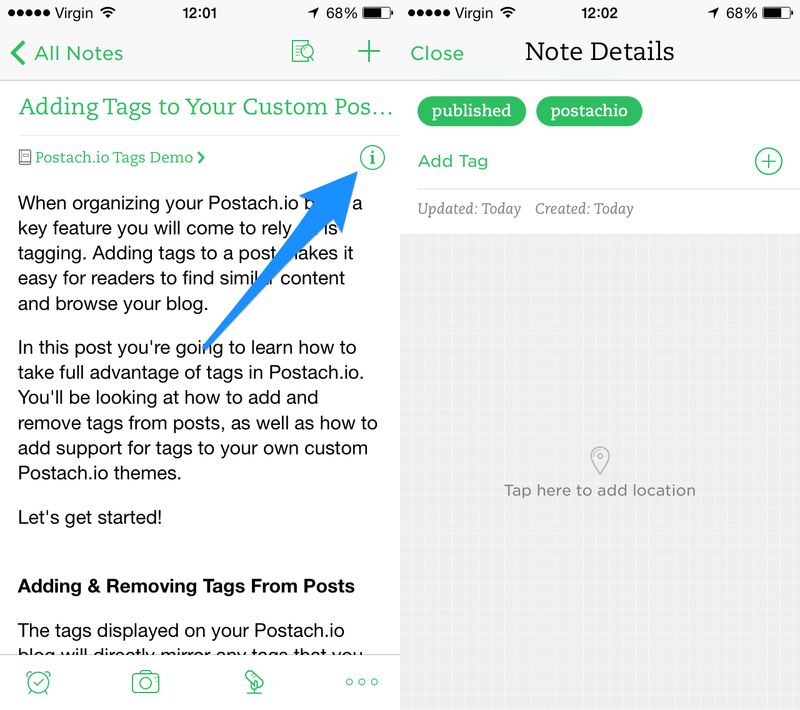
It's best to use a common set of tags throughout your blog to make it easier for readers to find similar posts.
Displaying Tags on Post Pages
Postach.io themes work by exposing a series of data objects which you can use to display information to the user. These objects are accessed using some special syntax which is processed by the templating engine and replaced with the corresponding data.
On individual post pages you have access to a post object containing information about the current post. This object has a tags property which represents a list of all the tags assigned to the post. Using a for loop, you can iterate through this list to display each of the tags on the page.
Let's take a look at an example of how to do this.
Note: Some of this code may look a bit strange if you haven't dealt with templating languages before. Basically anything enclosed within curly braces {} will be processed by the templating engine. The rest of the HTML code will be left untouched. Statements enclosed within curly braces with percentage signs ({% %}) are processed by the templating engine but don't directly output data that will become part of the page. These tags are generally used for things like for loops, or if/else control structures. Statements enclosed within double curly braces ({{ }}) output data that will become part of the markup for the page.
Back to the example. Here we first check to make sure that post.tags exists. If it does, we start by creating a new list (ul element) to hold the tags. We then create a for loop that will iterate over the post.tags list and expose a tag object for each entry in the list. For each of the tag objects we create a new list item containing a link to the dedicated tag page. (Each tag used within Postach.io has it's own dedicated page which lists all of the posts with that tag.) We've used a double set of curly braces to indicate to the templating engine that the value of the tag object should be output to the page.
If our post had the tags 'cat', 'dog', and 'rabbit,' the example above would generate the following HTML.
Next up, you're going to learn how to create a list of all the tags used throughout your blog.
Adding a Tag Cloud to Your Blog
In the previous section you learnt how to create a list of tags for an individual post. Now you're going to learn how you can create a tag cloud containing all of the tags used throughout your blog.
Every page of your blog has access to a global site object which contains information like the site title, description, and author. This object has a property called tags which contains a list of all the tags used on your blog.
By modifying the code from the previous section we can output a list of all the tags used on the site.
| {% if site.tags %} | |
| <div class="tag-cloud"> | |
| <h4>Tags</h4> | |
| <ul> | |
| {% for tag in site.tags %} | |
| <li><a href="/tag/{{ tag.name }}">{{ tag.name }}</a></li> | |
| {% endfor %} | |
| </ul> | |
| </div> | |
| {% endif %} |
There are two key differences between the code here and the example in the previous section. First of all, we're using site.tags in the for loop rather than post.tags. The second key difference is that the tag objects in the site.tags list have two properties, name and count. The name property contains the tag text, and the count property contains the number of posts that have this tag. For this example we've just used the name property.
You can make the tag cloud more visually appealing by adding some CSS code to the head of your theme template.
| <!-- Styling for tag cloud --> | |
| <style> | |
| .tag-cloud { | |
| width: 60%; | |
| max-width: 1280px; | |
| margin: 5em auto 1em; | |
| text-align: center; | |
| } | |
| .tag-cloud h4 { | |
| font-weight: bold; | |
| padding-bottom: 2em; | |
| } | |
| .tag-cloud ul { | |
| margin: 0; | |
| padding: 0; | |
| list-style: none; | |
| } | |
| .tag-cloud li { | |
| display: inline-block; | |
| margin: 5px; | |
| } | |
| .tag-cloud a, | |
| .tag-cloud a:visited { | |
| transition-property: all; | |
| -webkit-transition-property: all; | |
| transition-duration: 0.2s; | |
| -webkit-transition-duration: 0.2s; | |
| transition-timing-function: ease-in-out; | |
| -webkit-transition-timing-function: ease-in-out; | |
| transition-delay: initial; | |
| -webkit-transition-delay: initial; | |
| display: inline-block; | |
| background-color: rgb(175, 183, 181); | |
| color: rgb(255, 255, 255); | |
| padding-top: 1px; | |
| padding-right: 10px; | |
| padding-bottom: 1px; | |
| padding-left: 10px; | |
| border-top-left-radius: 15px; | |
| border-top-right-radius: 15px; | |
| border-bottom-right-radius: 15px; | |
| border-bottom-left-radius: 15px; | |
| font-size: 0.9rem; | |
| } | |
| .tag-cloud a:hover, | |
| .tag-cloud a:focus { | |
| background-color: rgb(55, 204, 162); | |
| } | |
| </style> |
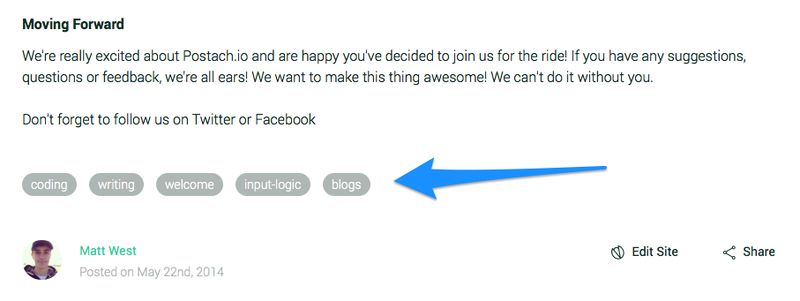
You can see an example of this tag cloud in action on the demo blog.
| {% if is_tag %} | |
| <h3 class="tag-header">Showing all posts tagged "{{ tag|format_tag(False, True) }}"</h3> | |
| {% endif %} |
| {% for post in posts %} | |
| <div class="item"> | |
| <h3><a href="{{ post.permalink }}">{{ post.title }}</a></h3> | |
| <div class="post-content" data-type-cleanup="true"> | |
| {{ post.content }} | |
| </div> | |
| <a class="post-author" href="{{ site.base_url }}"> | |
| <img src="{{ post.author.avatar }}" /> | |
| <p> | |
| <span class="post-author-name">{{ post.author.name }}</span> | |
| <span class="post-date">on {{ post.created_at|format_date }}</span> | |
| </p> | |
| </a> | |
| </div> | |
| {% endfor %} |
Summary
In this post you've learnt how to add tags to your custom Postach.io themes. You've looked at some examples of how to add tags to individual post pages, as well as how you can display all of the tags used throughout your blog in a tag cloud.
Tags are the backbone of your Postach.io blog and provide a key method of directing readers to collections of similar content. You may want to prominently display a small sub-set of the tags used on your blog to show off the topics you write about most. For information on how to do this check out How to Add Categories to Your Postach.io blog.